Note – You want to make sure that all of the fields are correctly filled out.
Note – If you have any issues throughout the process, feel free to let us know.
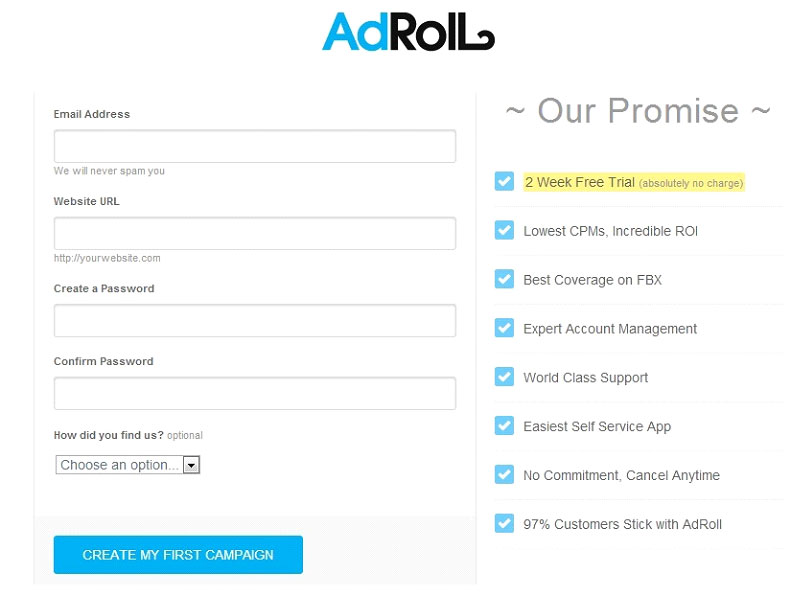
Account Setup (Step 2) – Fill in your E-mail, Website, and password. Then click on Create My First Campaign. Please make sure that all of the data inputted below is as accurate as possible as Adroll will enable you to change in the future but will require additional work in doing so. As you can see on the right side, Adroll has a list of promises which they have listed.
Note – Make sure that you enter a password which is strong enough for no one to figure out.
Note – When completed, click on “CREATE MY FIRST CAMPAIGN” and from there, you’re all set.
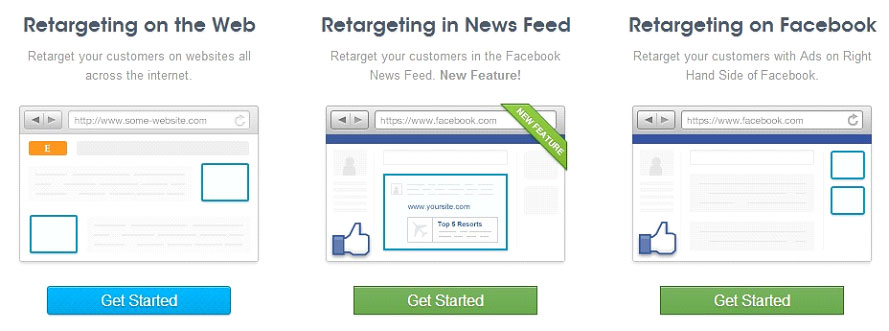
Account Setup (Step 3) – This campaign selection page will load as you can see below. The Adroll platform gives you the ability to advertise using multiple mediums such as the Web, The News Feed and also on Facebook. The ability to show ads on all three mediums makes Adroll the most powerful platform when it comes to Re-Marketing and Re-Targeting.
Note – Facebook Re-Targeting ADS are those used through the Facebook news feed.
Note – The Retargeting on Facebook shows ADS on the right side bar.
Note – The Retargeting around the web shows ADS on websites that the user is browsing.
Note – Adroll also has custom solutions such as Liquid ADS and so on, contact them.
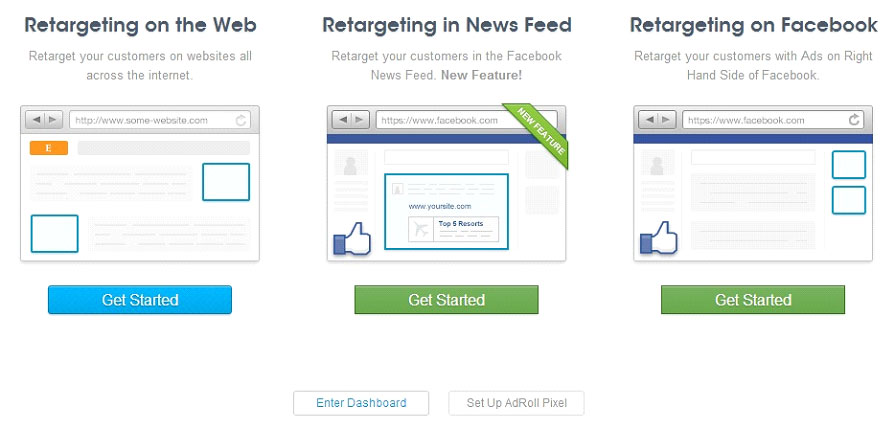
Account Setup (Step 4) – Once you have reached this screen, you can either start one of the methods listed above or move on to the Dashboard. We would recommend that you click on “Enter Dashboard” as this will enable you to configure your account before you start the account creation process. Adroll will enable you to setup a campaign at a later stage from the dashboard itself.
Note – You can enter the Dashboard to continue setup or you can setup Adroll now.
Note – We would recommend that you move to the Dashboard section first.
Account Setup (Step 5) – This step will show you the Adroll dashboard which has all kinds of options as shown in the right side bar. You have the ability to setup new campaigns, track conversion and many other features from within the Adroll dashboard. You can also view charts and other data on this screen as you can see in the middle of the screen below.
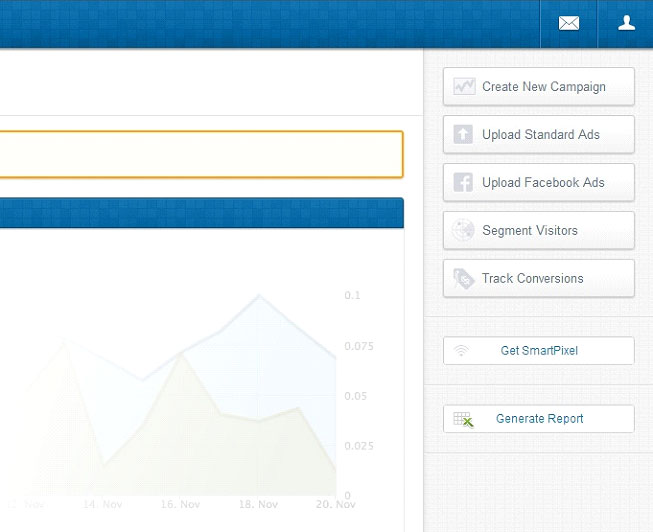
Note – Adroll also provides chart data which shows how many people have viewed.
Note – Adroll also enables you to Generate Reports and all kinds of other things.
Account Setup (Step 6) – This step will show you how and where to enter your profile information. You will notice that when you click on the profile icon in the upper right hand corner that there is a drop down showing a bunch of menu icons. Each one of these items should be viewed and configured / filled out before moving on to the next step. Please do so as shown below.
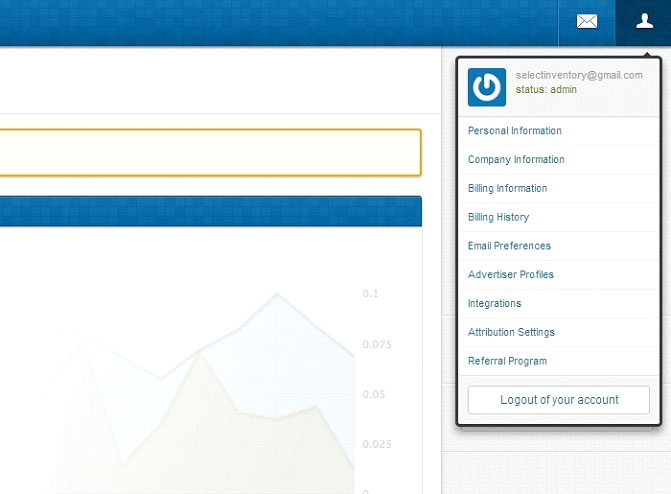
Note – The first menu item is the Personal information menu, fill that one out first.
Note – Continue through each of the menu items to move forward until they are all done.
Account Setup (Step 7) – This step will show you all of the company information which you need to go through and fill out. As you can see from the form below, you are asked to fill in information such as Company Name, Street Address, City, State and so forth. Make sure that you completed all of the information correctly. You may also completed additional information as shown in the left side bar.
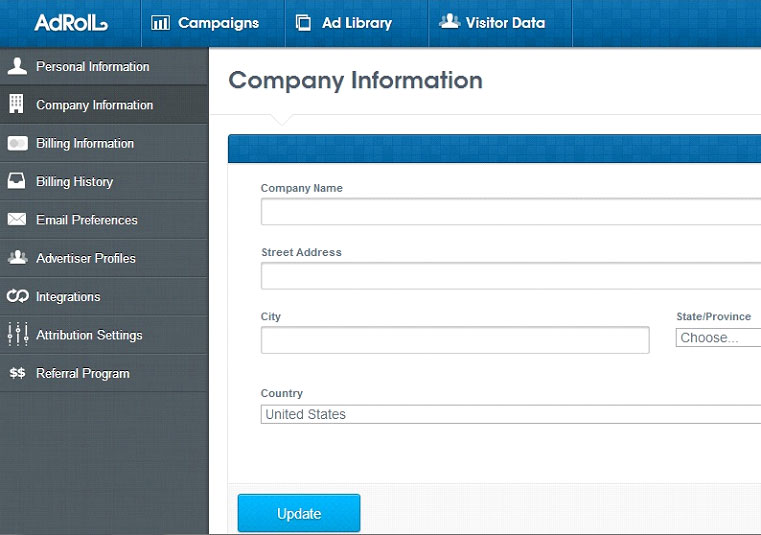
Note – Make sure that all information is filled in accurately so not issues occur later.
Note – Make sure to go through each item on the left side and complete all steps.
Account Setup (Step 8) – Next you will need to enter you billing. Click on billing information. Then click on add a credit card. Adroll does accept many forms of payment and you are free to use whichever one you would like. We recommend that you use Credit Card and also have a backup on file in the case one card has an issue for whatever reason. Complete this step and move forward.
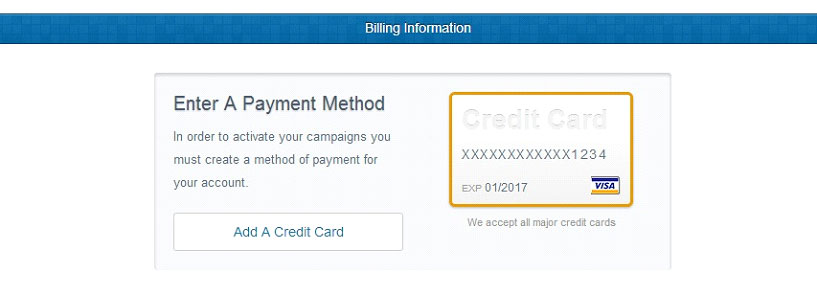
Note – You will want to click on “Add a Credit Card” to begin adding a billing method.
Note – It is recommended to have a backup on file to prevent any interruptions.
Account Setup (Step 9) – The next step would be to fill in your Credit Card information as shown below. The billing information asks for your Basic Information such as your first and last name and then asks for Billing Address such as your Street Address and so on. The last part will ask you for your Credit Card information and that should conclude the process of adding a Payment Option.
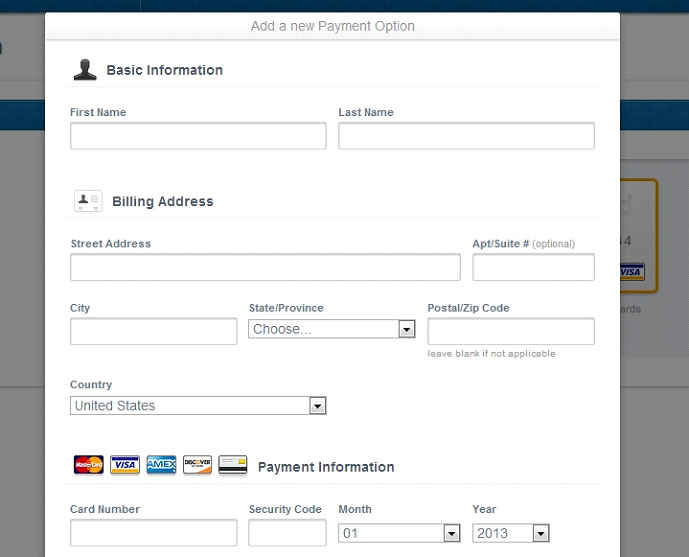
Note – We would recommend that you add multiple billing methods on file if possible.
Note – Make sure you review your billing information for accuracy before moving forward.
Account Setup (Step 10) – You will see confirmation that a card has been added on file. You have the option to add additional payment methods if you would like. You also have the option to Edit or Delete any payment method you have on file. We would recommend that you add additional payment methods to file incase one card has any issue in the future, the backup will be activated.
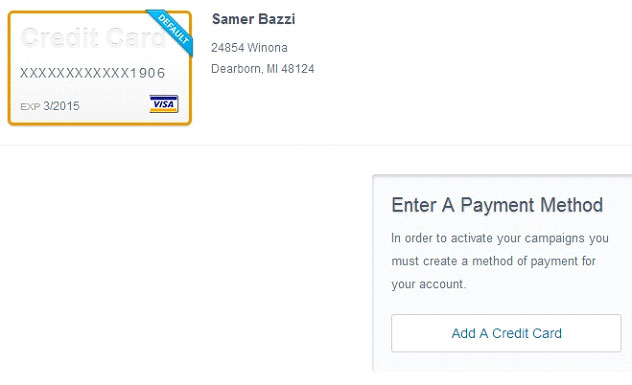
Note – You may decide to add an additional backup billing option on file if you would like.